Windows 10 has secret movie editor app that works just like the former Windows Movie Maker. You can use this application to edit videos, create movies, and the slideshows. It also has the feature that automatically creates videos. This movie editor application is a part of the Photos app. It is the remain of the Story Remix app of Windows 10 which was announced by the Microsoft for the Windows 10 Fall Creators Update last year. So why you’re looking for Windows Movie Maker alternative for Windows 10, or the Video editor for Windows 10 if there is already an official Movie editor app available?
How to Use Windows 10 Movie Editor
Using a default Movie Editor app in Windows 10 is super easy. To help users, I decided to write this detailed blog post on how to use it. To edit the videos using Movie Editor, here is what you need to do:
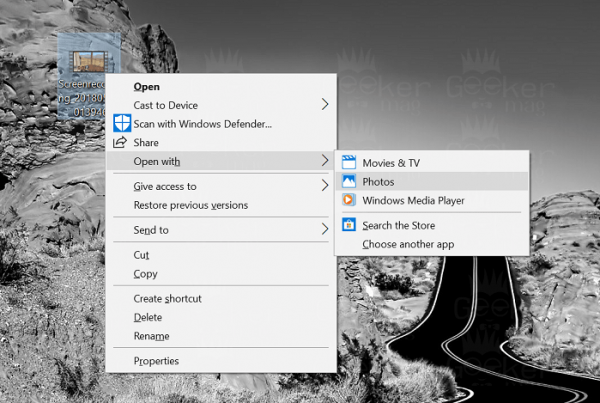
- Right click on the video you want to edit, then from the context menu select Open with -> Photos.
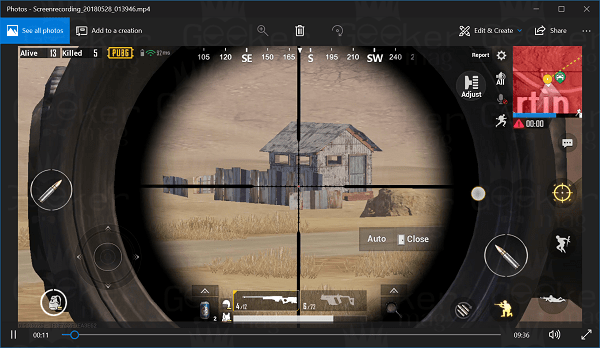
This will instantly open the video in Photos.
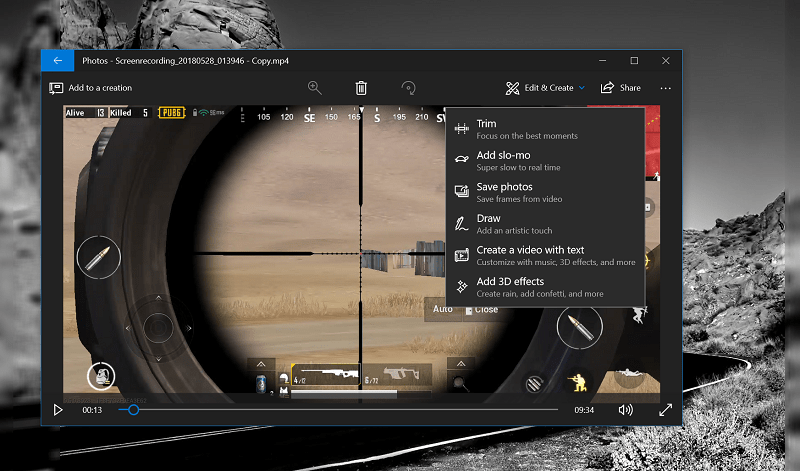
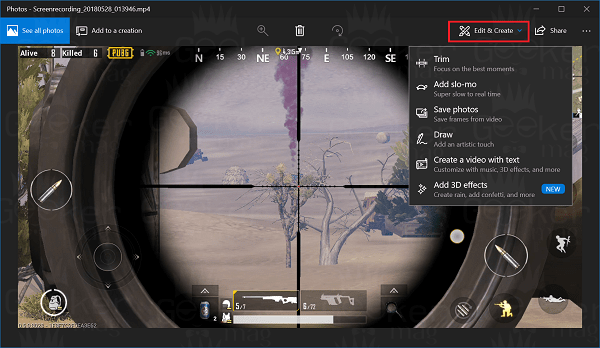
- To edit the video click on the Edit & Create option available in the toolbar.
This will show you various video editing tools like
Trim Add Slo-mo Save Photos from videos Create video from text Add 3D effect to video
Click on the one which you want to use.
Use Trim Tool in Movie Editor
Suppose you want to cut a particular part of the video, then select a Trim tool from the menu. After that drag the two handles available on each side of the playback bar to select starting and ending point of the video which you want to keep.
Once you’re sure that you have selected the right part, click on the Save a copy option available on the toolbar. This will open the Save dialog box, rename the video and save it where you want to save it. In case, you want to stop the video without making any changes then click on Cancel.
Use Slow Motion Tool in Movie Editor
Slow Motion tool works similar to Trim tool. Using this tool, you can select a slower speed and apply it to a particular selection of the video file.
To use this tool, you need to select the Starting and Ending point of the video. Once done, click on the Save a copy, rename video file and save it.
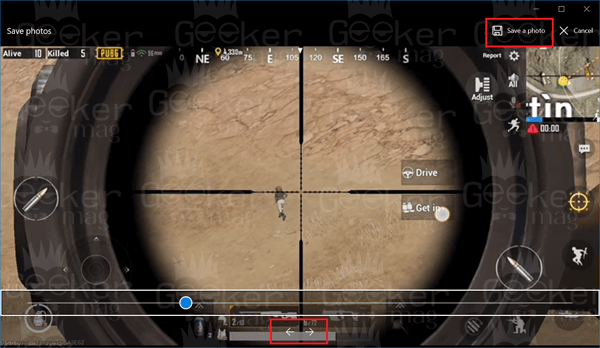
Use Save Photo Tool in Movie Editor
If you want to take a screenshot of a particular section of the video, then use this tool. At the bottom of video progress bar, you will see the Previous Frame and Next Frame buttons using them reach the video frame of which you want to take a photo.
After that click on Save a photo, rename the photo and save it. It will save the photo in JPG image format.
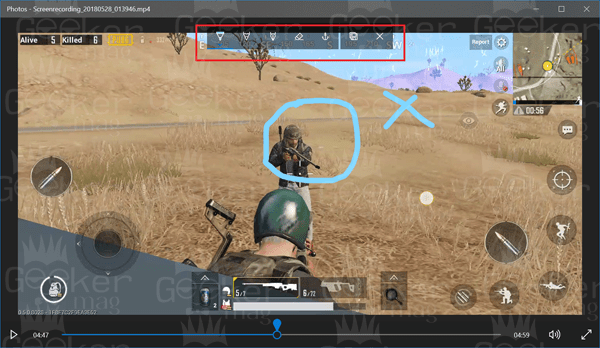
Use Draw Tool in Movie Editor
Another useful tool is the list is Draw tool, it let you draw on the video. The tool offers you various drawing tool like a ballpoint pen, calligraphy pen, pencil, eraser, and select favorite colors. Anything you draw using these tools will appear on the video as you drew it. It automatically fades out after few seconds.
Once you’re done with the drawing, click on Save icon next to Drawing tools.
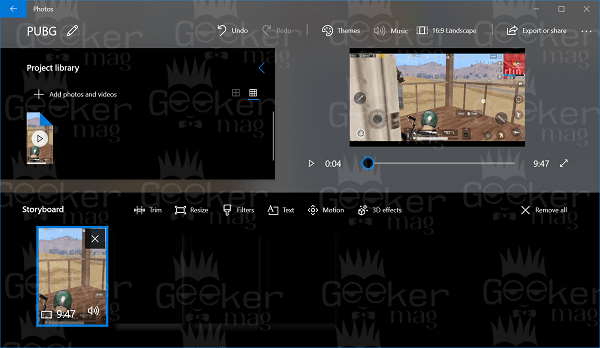
Use Create Video With Text
In case, you want to add text to your video, then take help of this tool. Once you select this tool, it will take you to advanced video project interface. Here dialog box will appear asking you to type the name for the video. From Project library drag and drop the video to Storyboard.
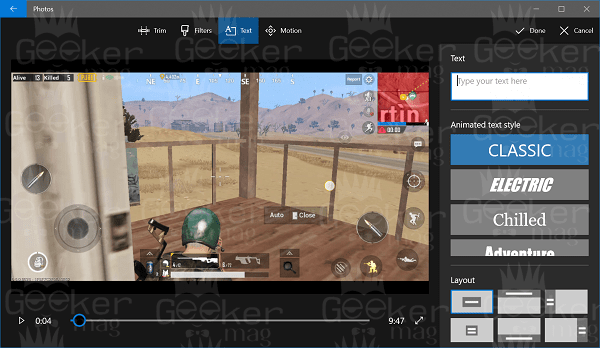
Now you will see advanced video editing features like Trim, Resize, Filters, Text Motion, 3D Effect. Suppose you want to add text, then click on the Tex option. The following screen will appear:
Here make the desired changes, and then click on the Done option. Now you will return back to advanced video editor screen, here click on the Export or Share available at the upper right side to save the video.
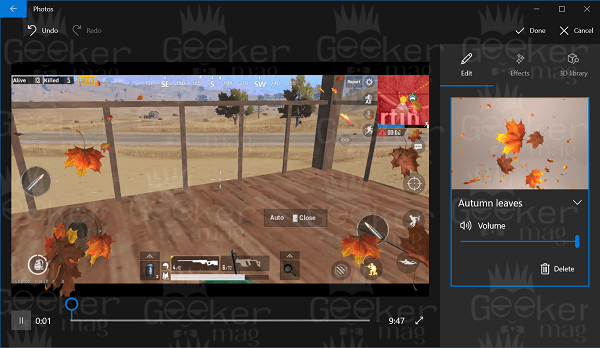
Use Add 3D Effect Tool in Movie Editor
To make your video artistic, you can add 3D effect to your video using the 3d effect tool available in the Movie Editor. Select the tool, and it will take you to screen where you will find a various effect on the right panel. Add the one which you think is perfect.
You can also increase the 3d effect duration from the video progress bar. Once you have made final changes, click on the Done to apply the changes. Apart from that, using the default video editor app, you can also combine videos, add 3d effects, and add texts. For that, you need to do a little experiment with the app. The default video editor application is not a powerful tool to get started in Windows 10, but surprisingly it has all tools that let you do basic video editing with simple and easy to use interface. Why don’t you give a try to default Windows 10 video editor and share your experience with me in the comments?