Local Group Policy Editor is a nifty tool that comes preinstalled in Windows 11 Pro edition. With the help of this tool, users can manage various policies to enable or disable features and functionality in Windows 11.
How to Enable Group Policy Editor in Windows 11 Home
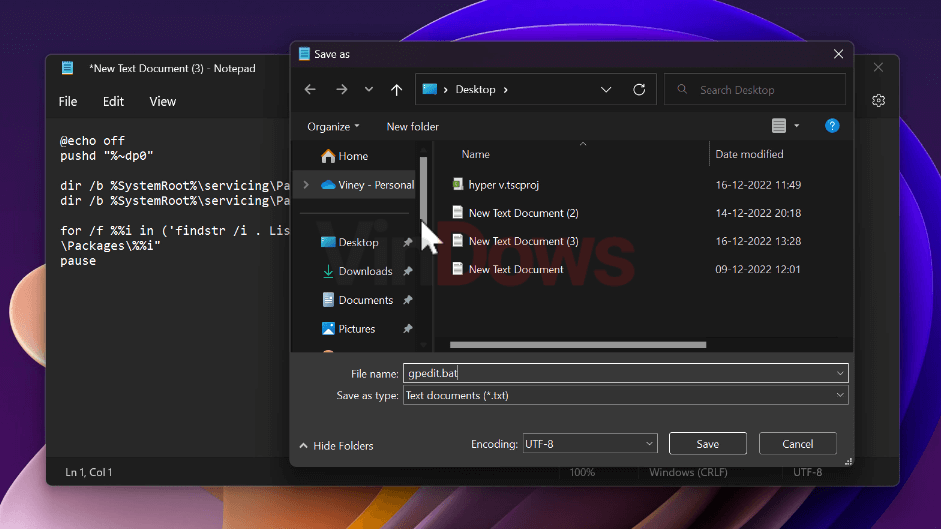
Unfortunately, Group Policy Editor is unavailable in Windows 11 Home edition. But there’s a hack using which you can enable on your PC running Windows 11 Home as well. So without further delay, learn the hack: Right-click on the Desktop, and select New > Text Documents. This will create an empty text document on the desktop. Open the document and copy-paste the following code into it: After that, click on File > Save as. In the Save as window, you need to name it something like ‘gpedit‘ and save the file with the .bat extension. So it looks like ‘gpedit.bat’ . Make sure to save it with .bat extension else this script will not work. Now you will have a .bat script on the location you’ve selected. Right-click on it and select “Run as administrator”, when the UAC dialog box appears, click Yes to continue. The Terminal window will open and installation of the group policy editor will start, the process will take around 30-40 seconds. Once the process completes, you will get the message “The process completed successfully“, click on any to exit the terminal. After that, reboot your computer to apply the changes. From now onwards, if you search for Group Policy editor in the Taskbar search, it will appear in the search results. Alternatively, Press the WIN + R key combination and type ‘gpedit.msc, click OK to open the Group Policy Editor. You can use this method if Group Policy Editor doesn’t appear in search results.