Sometimes conditions come when you have to gain full access to the files and folder in Windows 10. In most of the cases, these are system files and folders or created from the user who is no longer an active user. If any user tries to delete these files and folders, the operating system restricts users for doing that. Most of the time users see a message which reads “You Need Permission to Perform this Action in Windows.” No doubt this is a security feature, but there is one question in mind of every user, i.e., how to get rid of this situation? The Answer is by taking ownership in Windows 10 I’m sure not all users know how to take ownership of the folder in Windows 10 as the process is complicated. As you have to perform the various step to gain the ownership. So to help those users, we decided to cover the easiest way in this post.
Take Ownership of Files and Folder in Windows 10 – TakeOwnershipEx
In this post, we will take help of third party tool which works flawlessly. Here is how to do that:
- Download TakeOwnershipEx zip file using this link.
- Extract the zip file using any archiving tool. In the extracted folder you will get two different files. You need to run the file with the name “TakeOwnershipEx-1.2.0.1-Win8“. When the UAC dialog box appears, click Yes to continue and complete the installation.
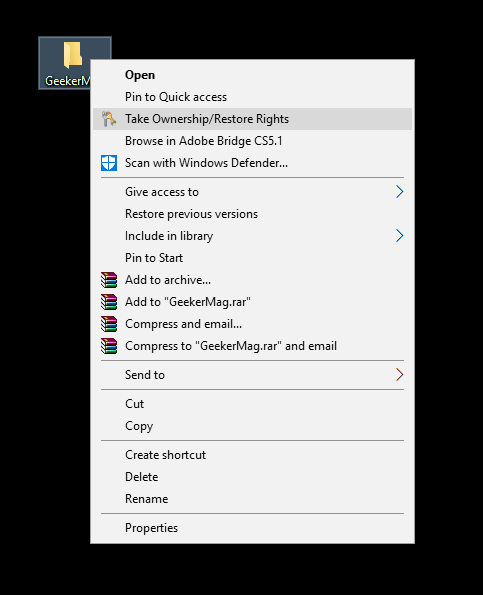
- To take ownership of the folder, make right-click on the system file or folder and from the context menu click Take Ownership/Restore Rights option. UAC dialog box will appear, click Yes to continue.
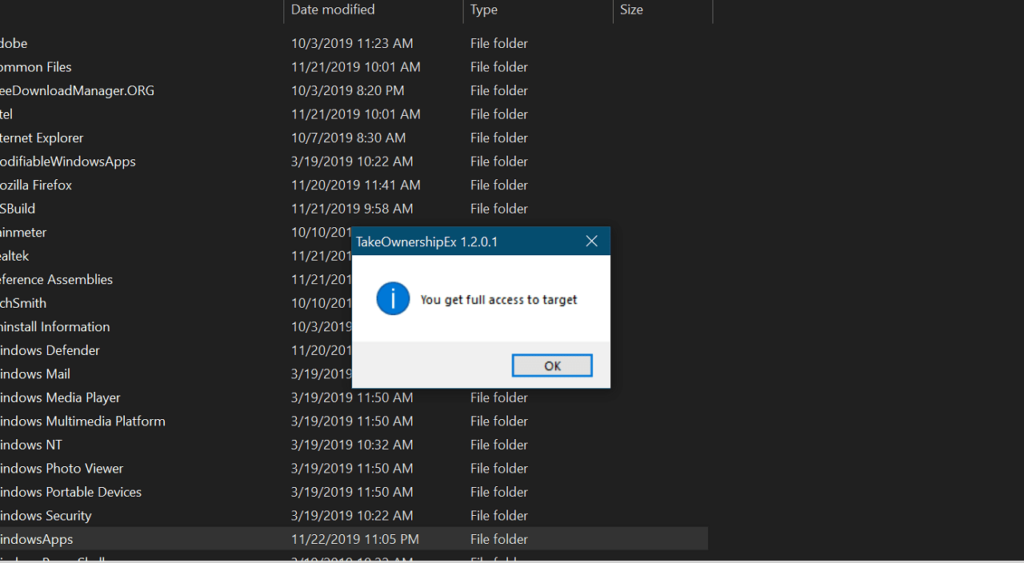
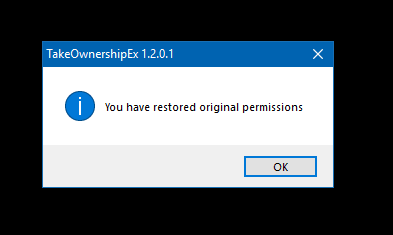
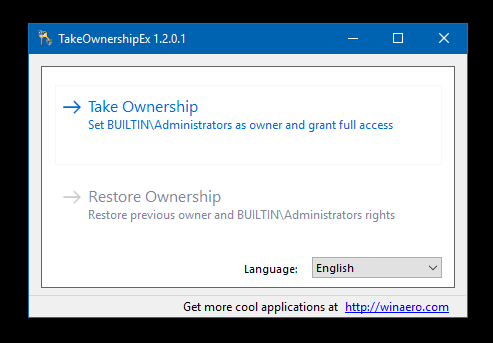
- A small pop-up window will appear telling you that “You get full access to target.” This message confirms that you have successfully gained the ownership of the folder in Windows 10. You can manage the folder the way you want. In case, you want to restore the permissions then again make right-click on the same folder and from the context menu select “Take ownership/Restore Rights.” Again UAC dialog box will appear, click on the Yes button. Now you will see a confirmation dialog box telling you that “Restored original permissions.” That’s it. This is how you can take ownership or permissions of folders and files in Windows 10. Alternatively, you can take application options to achieve ownership. Run the application Click on the “Take Ownership” and navigate to the folder of which you want to gain permissions and click OK. Following the same procedure, you can restore the original permissions. You can also check YouTube video for the clear idea: I hope you find this blog post handy. Why don’t you try this most straightforward method to take ownership of the folder in Windows 10? If you have any query drop it in the comments.